I’m counting down the days to the publication of my new book: “Modern Horse Training A Constructional Guide to Becoming Your Horse’s Best Friend”.
Everything is set to go (I hope). The publication date is April 26. While we are waiting, I’ve been sharing with you, not excerpts from the book, but some stories that explain the genesis of my training choices. Here’s today’s installment:
Yesterday I wrote about the link between ground work and riding. That sits at the core of the constructional approach to training that my horses have been teaching me. Here’s an example to help you understand how this works.
Suppose you are working with a youngster who hasn’t had much handling. You want this horse to pick up his feet for cleaning. That’s one of the universals we all need to teach our horses. It doesn’t matter if you want to ride English or western, or you don’t ride at all, horses need regular foot care.
But before you can pick up your horse’s feet, you need him to stand still and to be comfortable being handled. So there are some component skills that are handy to teach before you start trying to handle his feet.
You’ll be starting with the foundation lessons. You’ll be teaching him to stand still, to back up and come forward, to orient to targets, to stand on a mat. You’ll be starting in simple environments that make these lessons easier to teach. The new book covers this in detail so I won’t say more here. Let’s assume that you have taught your horse to stand on a mat, and you are now teaching him front leg flexions. As you develop this lesson, you are able to point at his shoulder and your horse will lift his foot up well off the ground into your waiting hand.
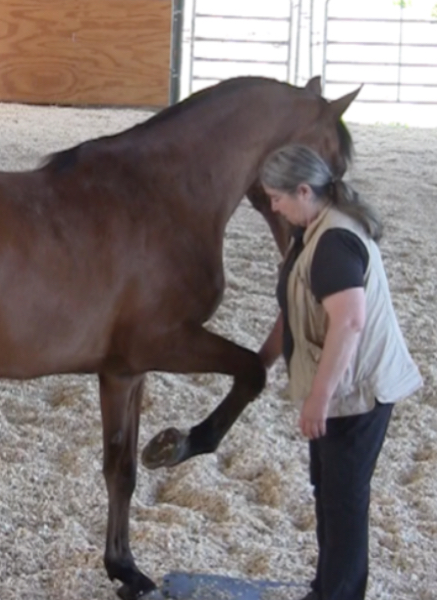
Robin shows a good example of a leg flexion. He’s targeting his knee to my hand. The balance these leg flexions teach make routine foot care very easy, and they also contribute to the good balance I look for under saddle.
Teaching leg flexions to your young horse will mean foot cleaning is easy. He’s lifting his foot up for you, and he’s become so well balanced he’s not leaning on you for support.
Foot care may not seem to be connected to riding, but it very much is. Those leg flexions are a wonderful prep for riding. They help your horse find the good balance that makes riding easier for both of you.
When you clean your horse’s feet, you could skip all this training. You could pry his feet up off the ground and accept having him shifting around and leaning on you for support. Cleaning his feet would be a chore, but you’d get it done.
You could skip all the “niceties” of the preliminary groundwork and get straight on, but your job will be much harder. You’ll be getting on an unbalanced horse who is much more of a challenge to ride.
I prefer to stack the deck more in favor of both my horse and myself. So another important lesson my horses have taught me is: If a lesson is becoming difficult for either the horse or the handler, it’s time to break the lesson down into smaller steps.
Remember I want to avoid “brick-wall” training. The sooner I recognize that a lesson is presenting puzzles my horse and I aren’t ready to solve, the easier it becomes to avoid crashing into metaphorical brick walls. I want to fine tune my detectors so long before a puzzle begins to generate frustration, anxiety, fear, or any other emotion that could get us into trouble, I’m already looking for the smaller, easier-to-teach underlying steps.
My horses have taught me to keep looking for smaller steps. If I break a lesson down into what I think is a small step, if it is still too hard, I will keep looking for the even smaller step that it can be divided into. Sometimes finding the smaller step means asking for less. It means asking for just a weight shift instead of a full step. It can also mean looking for the missing component part that is needed to make the lesson easier to understand. What do I need to teach first? If I haven’t introduced my horse to basic targeting, asking him to target his knee to my hand could easily become a frustrating lesson for both of us.
Looking for the smaller step has evolved into this “loopy training” guideline: To find a starting place for your training, you will keep dividing a lesson into smaller and smaller component parts, until you find something your learner CAN consistently do, even if that step seems very small and very far away from your goal behavior.
What am I describing?
Constructional training. This term comes from the work of Dr. Goldiamond, a behavior analyst and clinical psychologist. In a nutshell Goldiamond didn’t want to “fix” behavior. He wanted to build new repertoires of behavior – hence the name constructional training.
This fits perfectly with clicker training. Instead of focusing on what you aren’t liking, and setting goals that are centered around eliminating unwanted behavior, you reframe everything. You focus on what you want your horse TO DO, and you teach that. A constructional training approach matches the approach to training that for me began to evolve over 40 years ago.
Something else I learned a long time ago is good ideas are good ideas. They aren’t unique to any one person or any one source. When you find a convergence like this coming from two very different sources – clinical patients in Goldiamond’s case, and horses in mine, that’s a good indicator that you are on the right track.
The new book, “Modern Horse Training” is designed to help you become a skilled constructional trainer. It explains in detail how the concept of constructional training provides a wonderful framework for positive reinforcement training. Everything is connected to everything else makes perfect sense when you see your training from this perspective.
“Modern Horse Training” will be available as a hardcover, a paperback, and as an ebook. The publication date is April 26. You’ll be able to order it through my web site, theclickercenter.com and also through Amazon and other booksellers.
When I shared the runway lesson with you in the June 2016 posts, I talked about constructional training. That’s where you teach the skills you’ll need for a particular task BEFORE you need to use them. Before you build a house – or even a birdhouse – you must first learn how to use a hammer.
That’s what we’re doing with the mounting block lesson. I’m going to use the “Why Would You Leave Me?” game to teach my horse the skills he’ll need to line himself up to the mounting block BEFORE I take him anywhere near the mounting block. (Refer to the previous installment of JOYFull Horses: https://theclickercenterblog.com/2016/07/27/ and Lesson 5 in the Click That Teaches DVD Lesson Series: “The Why Would You Leave Me?” Game)
In training we talk about breaking each lesson down into smaller steps so it becomes easier for your learner to understand what is wanted. Constructional training is another way of looking at this basic teaching strategy. What are the skills you need for the task at hand? Do you have those skills? Yes, then the task will be within your reach. No, then build the skills first.
When you build skills first, you find that each new thing you ask for is really just an easy step beyond what you already have. So before I play what I refer to as the “capture the saddle” game, I first build the skills I’ll need for this lesson via the “why would you leave me?” lesson.
Capture the Saddle – A Targeting Game
Photo 1.) Why would you leave me? At this point in the lesson, Robin’s answer would be: I can’t think of a single reason. I’m happy to stay right here by your side.
Why would you leave me? Answer: I can’t think of a single reason. I’m happy to stay right here by your side.
When that’s the answer, you have a horse who is ready to walk with you to the mounting block.
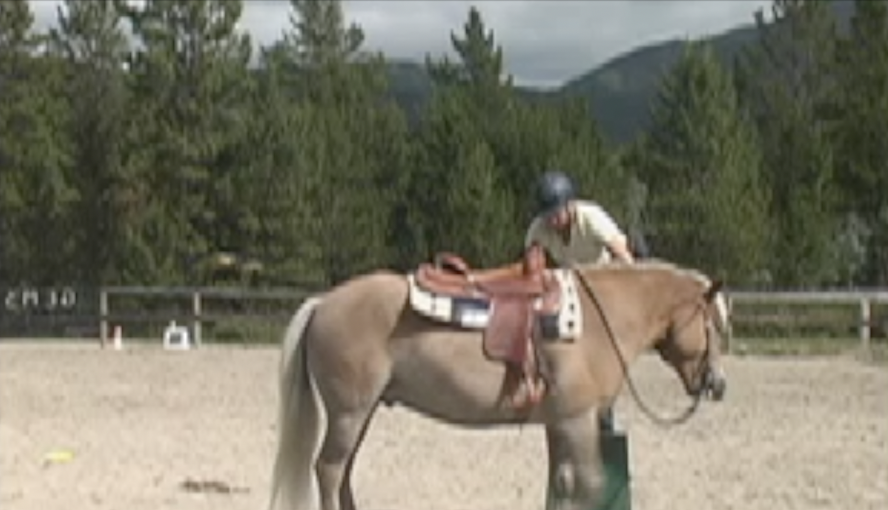
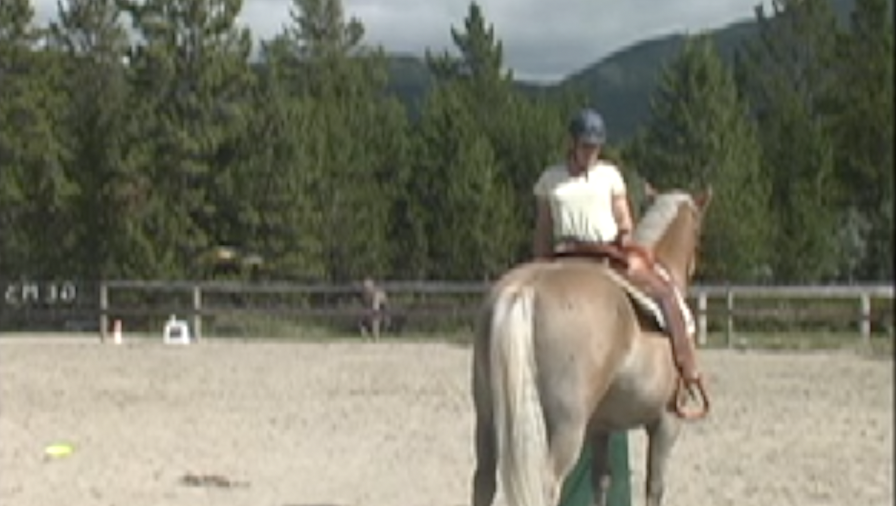
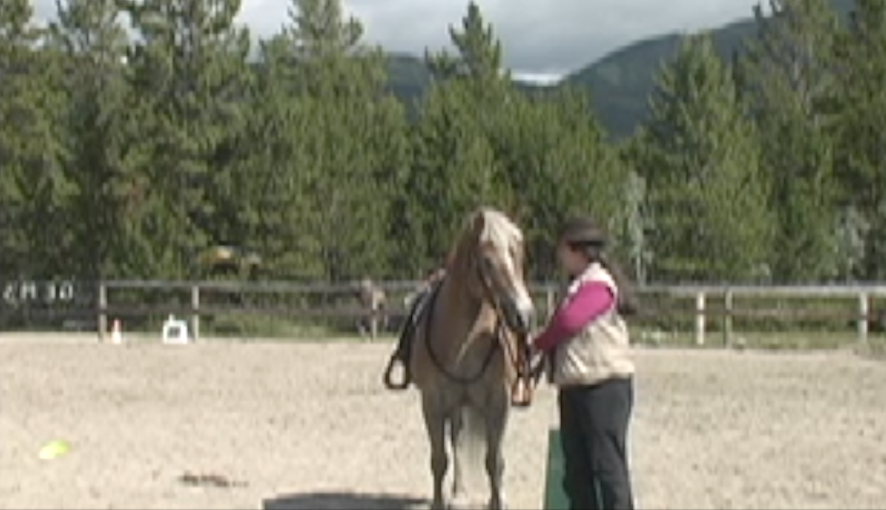
I’ve pulled some photos from a video of the “capture the saddle” lesson. The resolution isn’t the greatest since they come from a video, but they illustrate well how the lesson works. The horse I am working with is a young haflinger who didn’t know how to stand well for mounting.
Photo 2.) Getting a Baseline.
His owner didn’t use mounting blocks so this was a new concept for him. When she asked him to stop with her beside the mounting block, he kept going. He ended up facing in the opposite direction. Previous experience had taught him that it was a good idea to keep the saddle well away from her. This is a very common scenario, one many riders have to deal with.
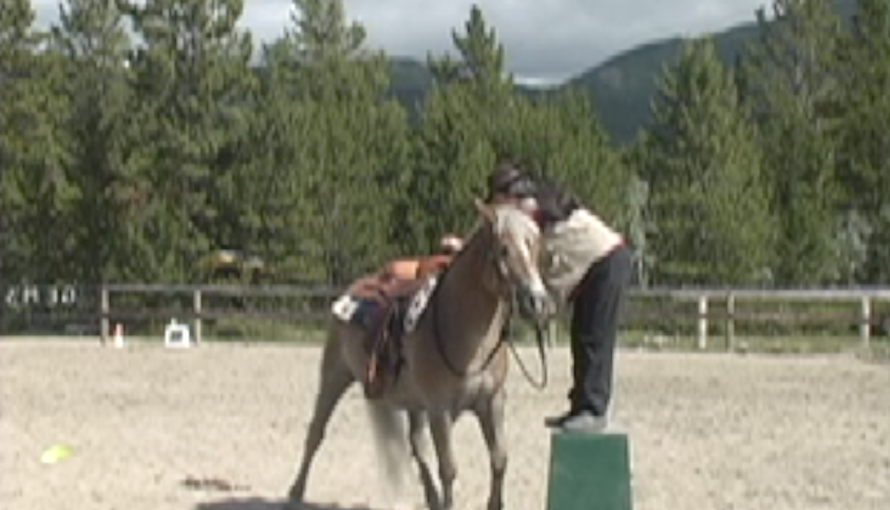
Photo 3.) This is a horse who doesn’t understand mounting blocks.
We can’t expect this horse to understand instantly what is wanted. Instead we went through the steps that would teach him how to line up next to a mounting block so his rider could easily get on.
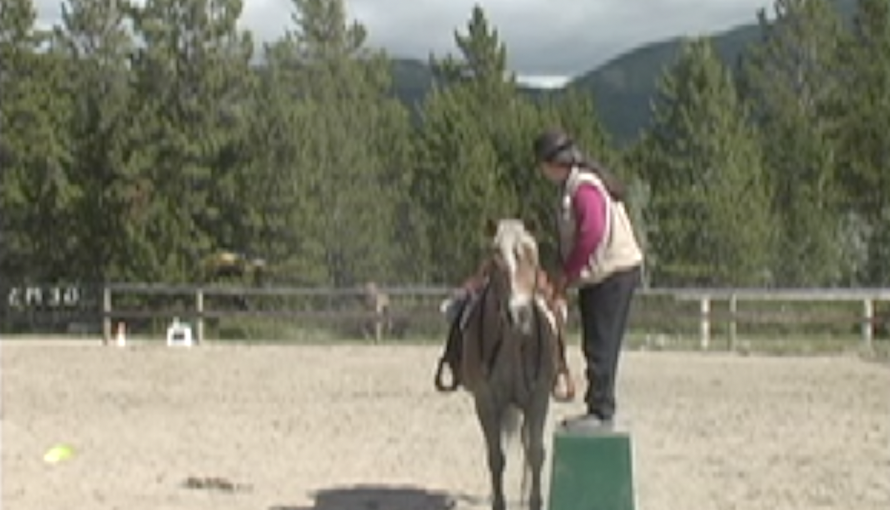
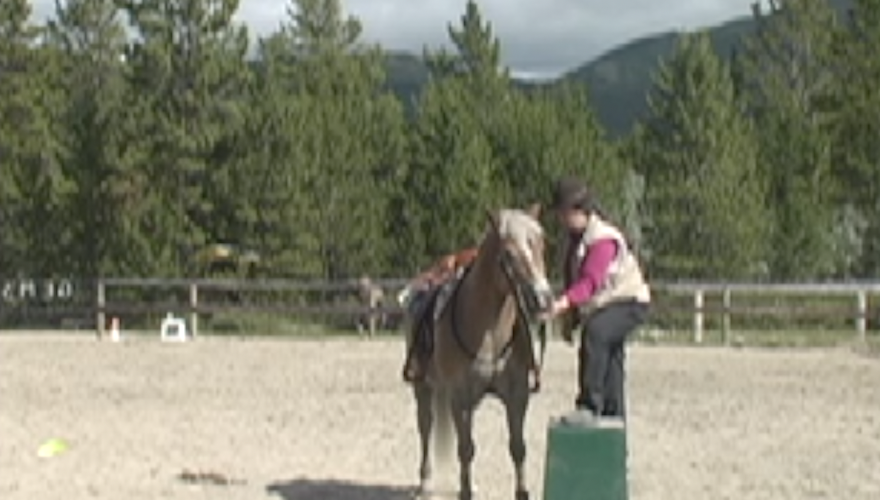
Photo 4.) We want to go from this . . .
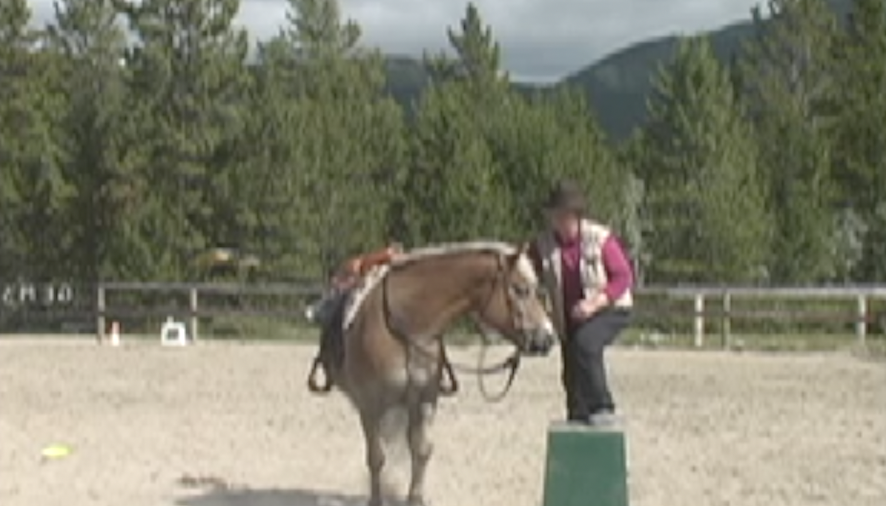
Photo 5.) . . . to this.
We weren’t just teaching him to line up next to a mounting block. That could easily have been done with targeting. He was also learning how to soften and respond to rein cues. That’s an important extra that this lesson gives us. His owner reported that he was an incredibly wiggly horse who was very difficult to ride. BEFORE she gets back on, the mounting block lesson will help him to be better balanced and more connected to her.
6.)
7.)
8.)
Photos 6-8
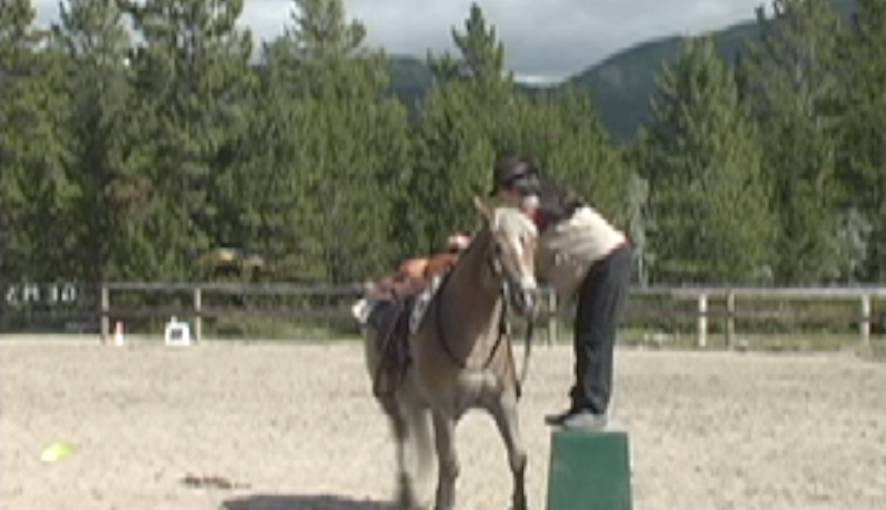
Photos 6-8.) The three photos above show how I begin with the “Why would you leave me?” lesson. He’s learning to walk with me. Note, as I approach the mounting block, I am not holding onto the reins. I want him to stop with me as I step up onto the mounting block.
Photo 9
Photo 9.) He doesn’t know this part of the lesson. He’s not expecting to stop at the mounting block, so he over shoots the mark. That’s okay.
I could teach this part of the lesson in many different ways. I could use targets and mats to help him out, but remember, I want to prepare this horse for riding. Riding includes not just all those times when things are going great. It also includes the sudden scares that can send even the most solid of riding horses jumping to the side.
The mounting block lesson confirms that your horse understands how to respond to your rein cues. It provides an essential safety net for those times when things are going wrong, and it is also a core building block for creating the great performance we all dream of having when things are very right.
10.)
11.)
12.)
Photos 10-12
So in photos 10-12, I have taken the left rein, and I am asking this horse to soften and bend his nose towards me. That causes his hips to swing out away from me. Essentially his front end is stopping before his hind end. The extra momentum from his hind end causes him to swing around to the front side of the mounting block. In horse training language he is yielding his hips.
He has ended up facing in the opposite direction from the one in which we started. (Photo 13) That’s more than okay. I’ll first ask him to take a step or two back so I can easily reach the right rein.
13.)
14.)
21.)
22.)
Photos 13-16
Next I’ll have him soften and come around me on his right rein. (Photo 14) As he swings back to the opposite side of the mounting block, I’ll again ask him to take a step back. (Photo 15) This does two things. It helps him to rebalance, and it gives me access to the left rein. (Photo 16)
By the time I get on, I will know that he will soften and yield his hips to both reins. Many people get in a hurry with this lesson. They become too goal oriented. They are thinking only about getting on. I am thinking about the ride ahead. I want it to be safe. That’s first and foremost. And then I want it to be fun – for both the horse and the rider. That’s not going to happen if the horse is out of balance and disconnected from his rider. So the “capture the saddle” lesson is really one that should be process not goal driven. Yes, I want my horse to line up next to the mounting block, but it’s not a race to see who can teach this the fastest. Each time this horse swings wide, he’s giving me another opportunity to explain rein cues to him.
As he comes past me again on his left side, I let go of the rein and reach out towards the saddle. (Photo 17) He’s not ready to let me get to the saddle. In the photos below you see that he swings wide again. (Photos 18-19) That just gives me another opportunity to ask him to soften to the right rein. (Photo 20)
At no point in this do I want the horse to feel as though I am punishing any of his responses. This is about teaching him WHAT TO DO. It is not about blocking or stopping unwanted reactions.
17.)
18.)
19.)
20.)
Photos 17-20.)
As he swings past the mounting block, I can again ask him to take a step or two back. (Photo 21) This helps him to rebalance, and it also gives me access to the left rein. I’ll ask him to step forward to line up along side the mounting block. (Photo 22)
21.)
22.)
Photos 21-22
As he comes past me again on his left side, I LET GO OF THE REIN. (Photo 23)
Photo 23.)
This is very important. I don’t want to block him to make him stand still. Remember always – you want energy. You want your horse to move his feet. This lesson redirects his energy. It doesn’t block it. You are releasing him into a halt, not stopping him from moving. There is a huge difference. (I’ll refer you again to my books and DVDs for a more in depth discussion of this very important concept. Visit theclickercenter.com)
As I release the rein, I am reaching up to touch the saddle. (Photo 23) Click and treat. (Photo 24.) The clickable moment for this phase of the lesson occurs as my hand makes contact with the saddle. So this lesson begins with rope handling and ends with targeting.
Photo 24.)
I’d like him to come forward half a step so he is in a better position for me to get on. I use the left rein to ask for this step. (Photo 25.) As he begins to respond, I again release the rein and touch the saddle. (Photo 26.) Click and treat. (Photo 27.) We’re making progress. This time he doesn’t swing away.
25.)
26.)
27.)
Photo 25-27.)
Photos 28-30.) I ask him for another small step forward. (28.) This time when I reach out for the saddle, he’s in perfect position. (29.) Click and treat. (30.)
28.)
29.)
30.)
Photos 28-30.)
Remember though, it isn’t so much about the goal of lining up next to the mounting block as it is about his response to the reins.
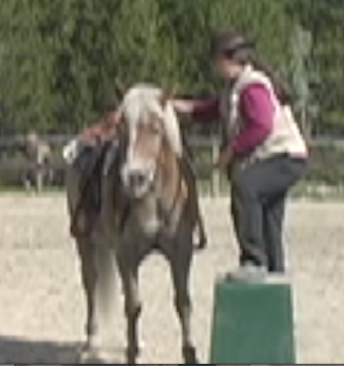
So far I have clicked and reinforced him just for letting me make contact with the saddle. Now I am making it harder. I have stepped all the way up onto the mounting block so I can lean down onto the saddle and add some weight. I’m really seeing if I can “capture it”. (Photo 31.)
(Photo 31.)
(Photo 32.) The answer is – not yet.
(Photo 32.)
He swings wide out from under my hands. Again, this is okay. It gives me another opportunity to ask him to soften and yield his hips. All of this bending and connecting to the rein helps him to become more supple and better balanced. That’s going to help him be more connected to his rider.
So as he swings around past me on the left rein, I’ll again ask him to rebalance by taking a step or two back, and then I’ll bring him back in front of me first on the right rein, and then on the left. (Photos 33-36.)
33.)
34.)
35.)
36.)
Photos 33-36)
As he passes the mounting block, I again let go of the rein and reach for the saddle. (Photo 36.) He’s better balanced than he was in the first couple of passes, and he’s in a much better position. It’s easy for me to touch the saddle. This time I can really grab the saddle. (Photo 37.) Click and treat. (Photo 38.)
37.)
38.)
Photos 37-38.)
I use the word grab because I don’t want to be delicate in this. I want this horse to really feel me taking the saddle in my hands. This is the target position. As soon as I have both hands on the saddle – Click!
39.)
40.)
Photos 39-40
I’ve asked him to go forward another step (Photo 39.) and this time he swings a little too wide so I can’t reach the saddle. (Photo 40.) The pattern should be familiar by now. I ask him to swing back around via the right rein, (Photo 41.) then I bring him forward past me on the left rein. (Photo 42.)
41.)
42.)
43.)
44.)
Photos 41-44
He comes in really close to the mounting block. It’s easy to capture the saddle. (Photo 43.) Click and treat. (Photo 44.) This isn’t an ideal orientation for getting on, but we’re making good progress.
I ask him to come forward one small step. This adjustment puts him into a great position for me to get on. Click and treat. (Photos 45-47.)
45.)
49.)
47.)
Photos 45-47
He’s made great progress. We’ve gone from the photo on the left (48) to the one on the right (49) in just a couple of passes.
48.) We want to go from this . . .
49.)
Photo 48-49
It’s time for a break.
Photo 50
I’ve gotten down from the mounting block. (Photo 50.) We’re going to walk a large “why would you leave me?” circle back to the mounting block. Remember that means I’ll be asking him to walk beside me without my needing to take the reins to keep him with me. (Photo 51.)
51.)
52.)
53.)
54.)
Photos 51-54
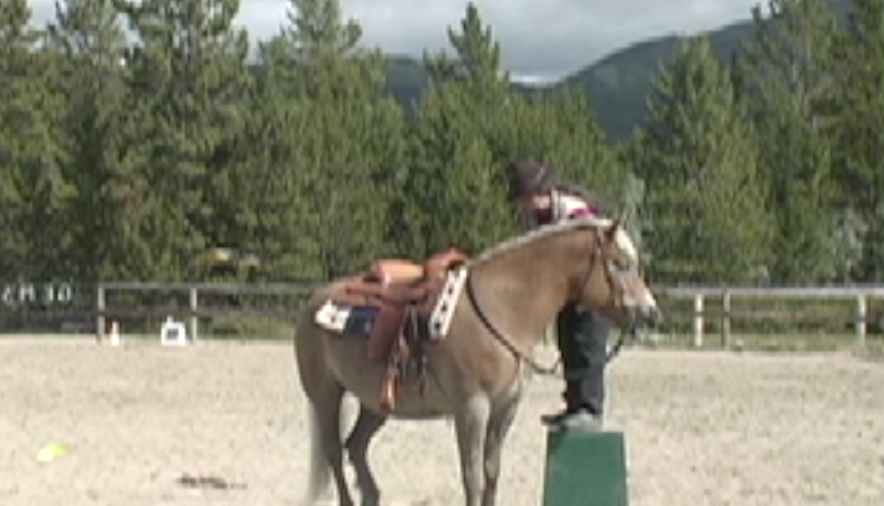
I approach the mounting block hands free. (Photo 51.) As I step up onto the mounting block, he stops on his own. (Photo 52.) He’s brought the saddle into perfect position. I can really grab hold of the it and truly capture it. (Photo 53.) Click and treat. (Photo 54.) This is a horse who is telling me he’s ready for me to get on.
As the horses figure out that they get clicked for bringing the saddle to our waiting hands, they become increasingly clever about lining themselves up to whatever we are using for a mounting block.
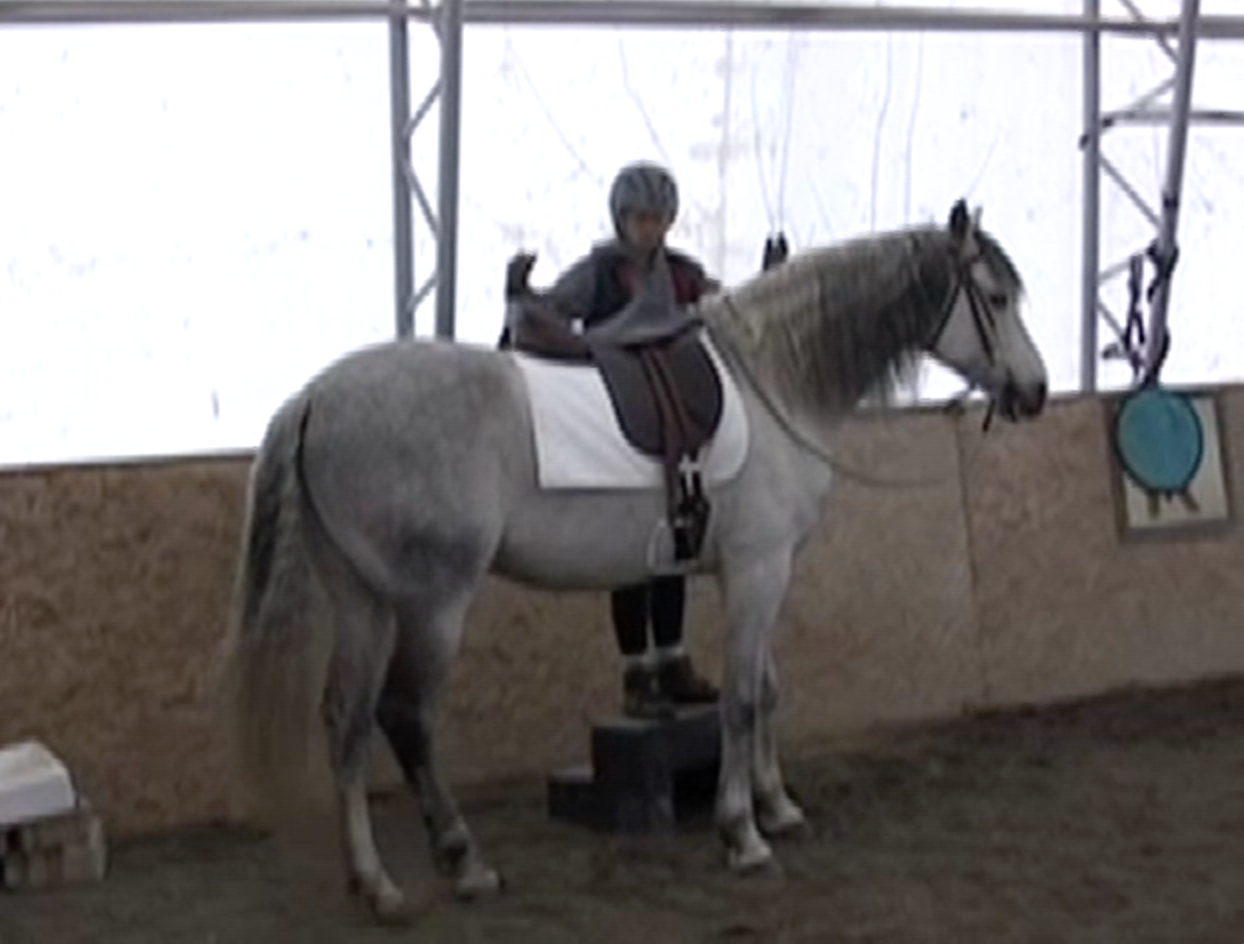
It’s great fun having your horse bring the saddle to your waiting hands. (Photo 55.)
55.) This horse is bringing the saddle to his rider’s waiting hands.
Photo 55
Sometimes a horse will misjudge the approach and ended up slightly angled out to the side. You know he has truly understood the lesson when, without any prompting from you, he steps sideways so he can bring the saddle to your waiting hands. That’s a horse who really understands the game. Click and treat.
As this video shows, sometimes a mounting block is a tree stump, or in this case a metal gate. When a horse understands the capture the saddle lesson, he will line himself up to anything you treat as a mounting block.
If you have a horse who dances around a mounting block, this lesson will definitely help you. But please note: this article began with a discussion of constructional training. The more preparation you bring to it, the easier the lesson will be.
The preparation goes beyond the “Why Would You Leave Me?” Game. It’s a matter of looking at what comes before what comes before the lesson you want to work on.
What comes before the “Why would you leave me?” Game? Lots of preparation. That’s prep for your horse AND prep for you. Anytime you use a lead or reins, you want to practice first without your horse so your handling skills are horse-friendly and clicker compatible. The how-to instructions for using reins and leads is beyond the scope of this single article. For that please visit: theclickercenter.com and theclickercentercourse.com
Coming Next: Cue Communication Part 5: Grand Prix Behaviors
Remember, if you are new to the JOY Full Horse blog, click on the JOY Full Horses tab at the top of this page to find the full table of contents and links to each of the articles I have published so far.
I hope you will want to share these articles by sending links to this blog to your friends. But please remember this is copyrighted material. All rights are reserved. Please do not copy any of the “JOY Full Horses” articles without first getting written permission from Alexandra Kurland, via theclickercenter.com
Also note: these articles are not intended as an instruction guide for introducing your horse to clicker training. If you are new to clicker training and you are looking for how-to instructions, you will find what you need at my web sites:
In the previous section I described how I taught Peregrine to line himself up to a mounting block. He was already an experienced riding horse who was familiar with mounting blocks so this was an easy lesson. I used two targets to bring him into position. The first brought him to the mounting block and the second took him forward a couple of steps so he ended up positioned exactly where I needed him to be in order to get on.
Capture the Saddle
I teach the mounting block lesson very differently these days. The lesson is called: “Capture the Saddle”. (Refer to Lesson 11 in The Click That Teaches DVD Series: “Capture the Saddle”.) It begins with rope handling and directed learning and ends with targeting. I teach it in this way because I regard the mounting block lesson as a final safety check before a rider gets on. The lesson shows how well connected you and your horse are to one another. BEFORE you get on and need to rely on them for your safety, it confirms that you BOTH know how to communication via the reins and are comfortable with their use.
A horse that has been well prepared with good ground work will breeze through this lesson. The prerequisite is a lesson that I have named: The “Why Would You Leave Me?” game. I will refer you to the DVD of that name for the details on how to teach this lesson. (This is Lesson 5 in The Click That Teaches DVD Lesson Series)
The “Why Would You Leave Me?” Game
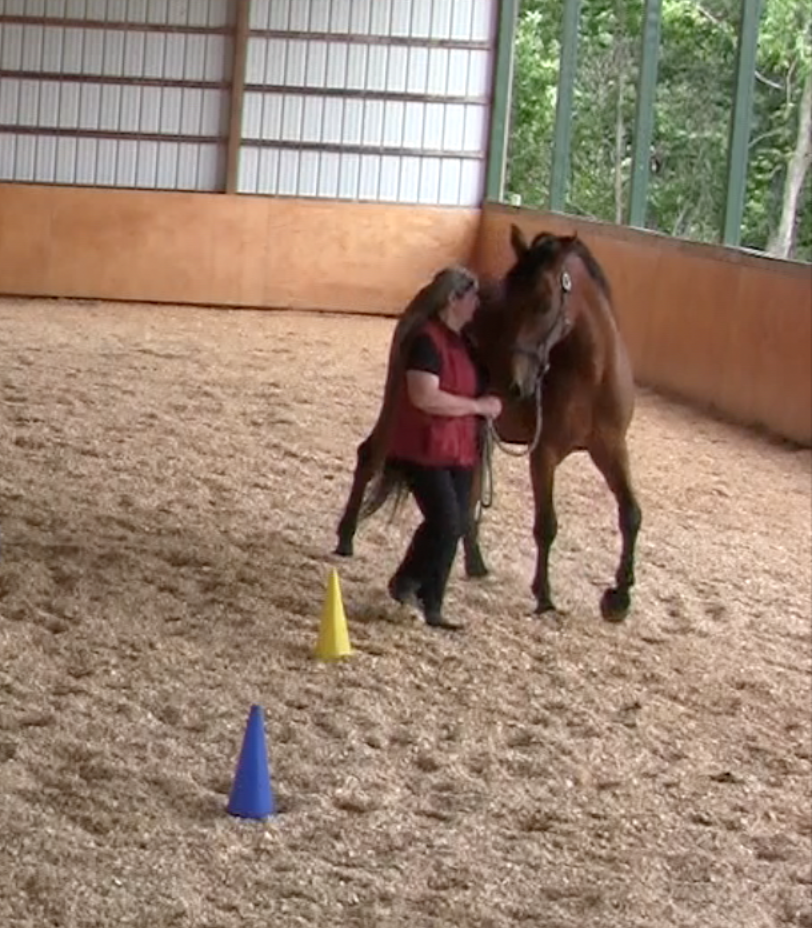
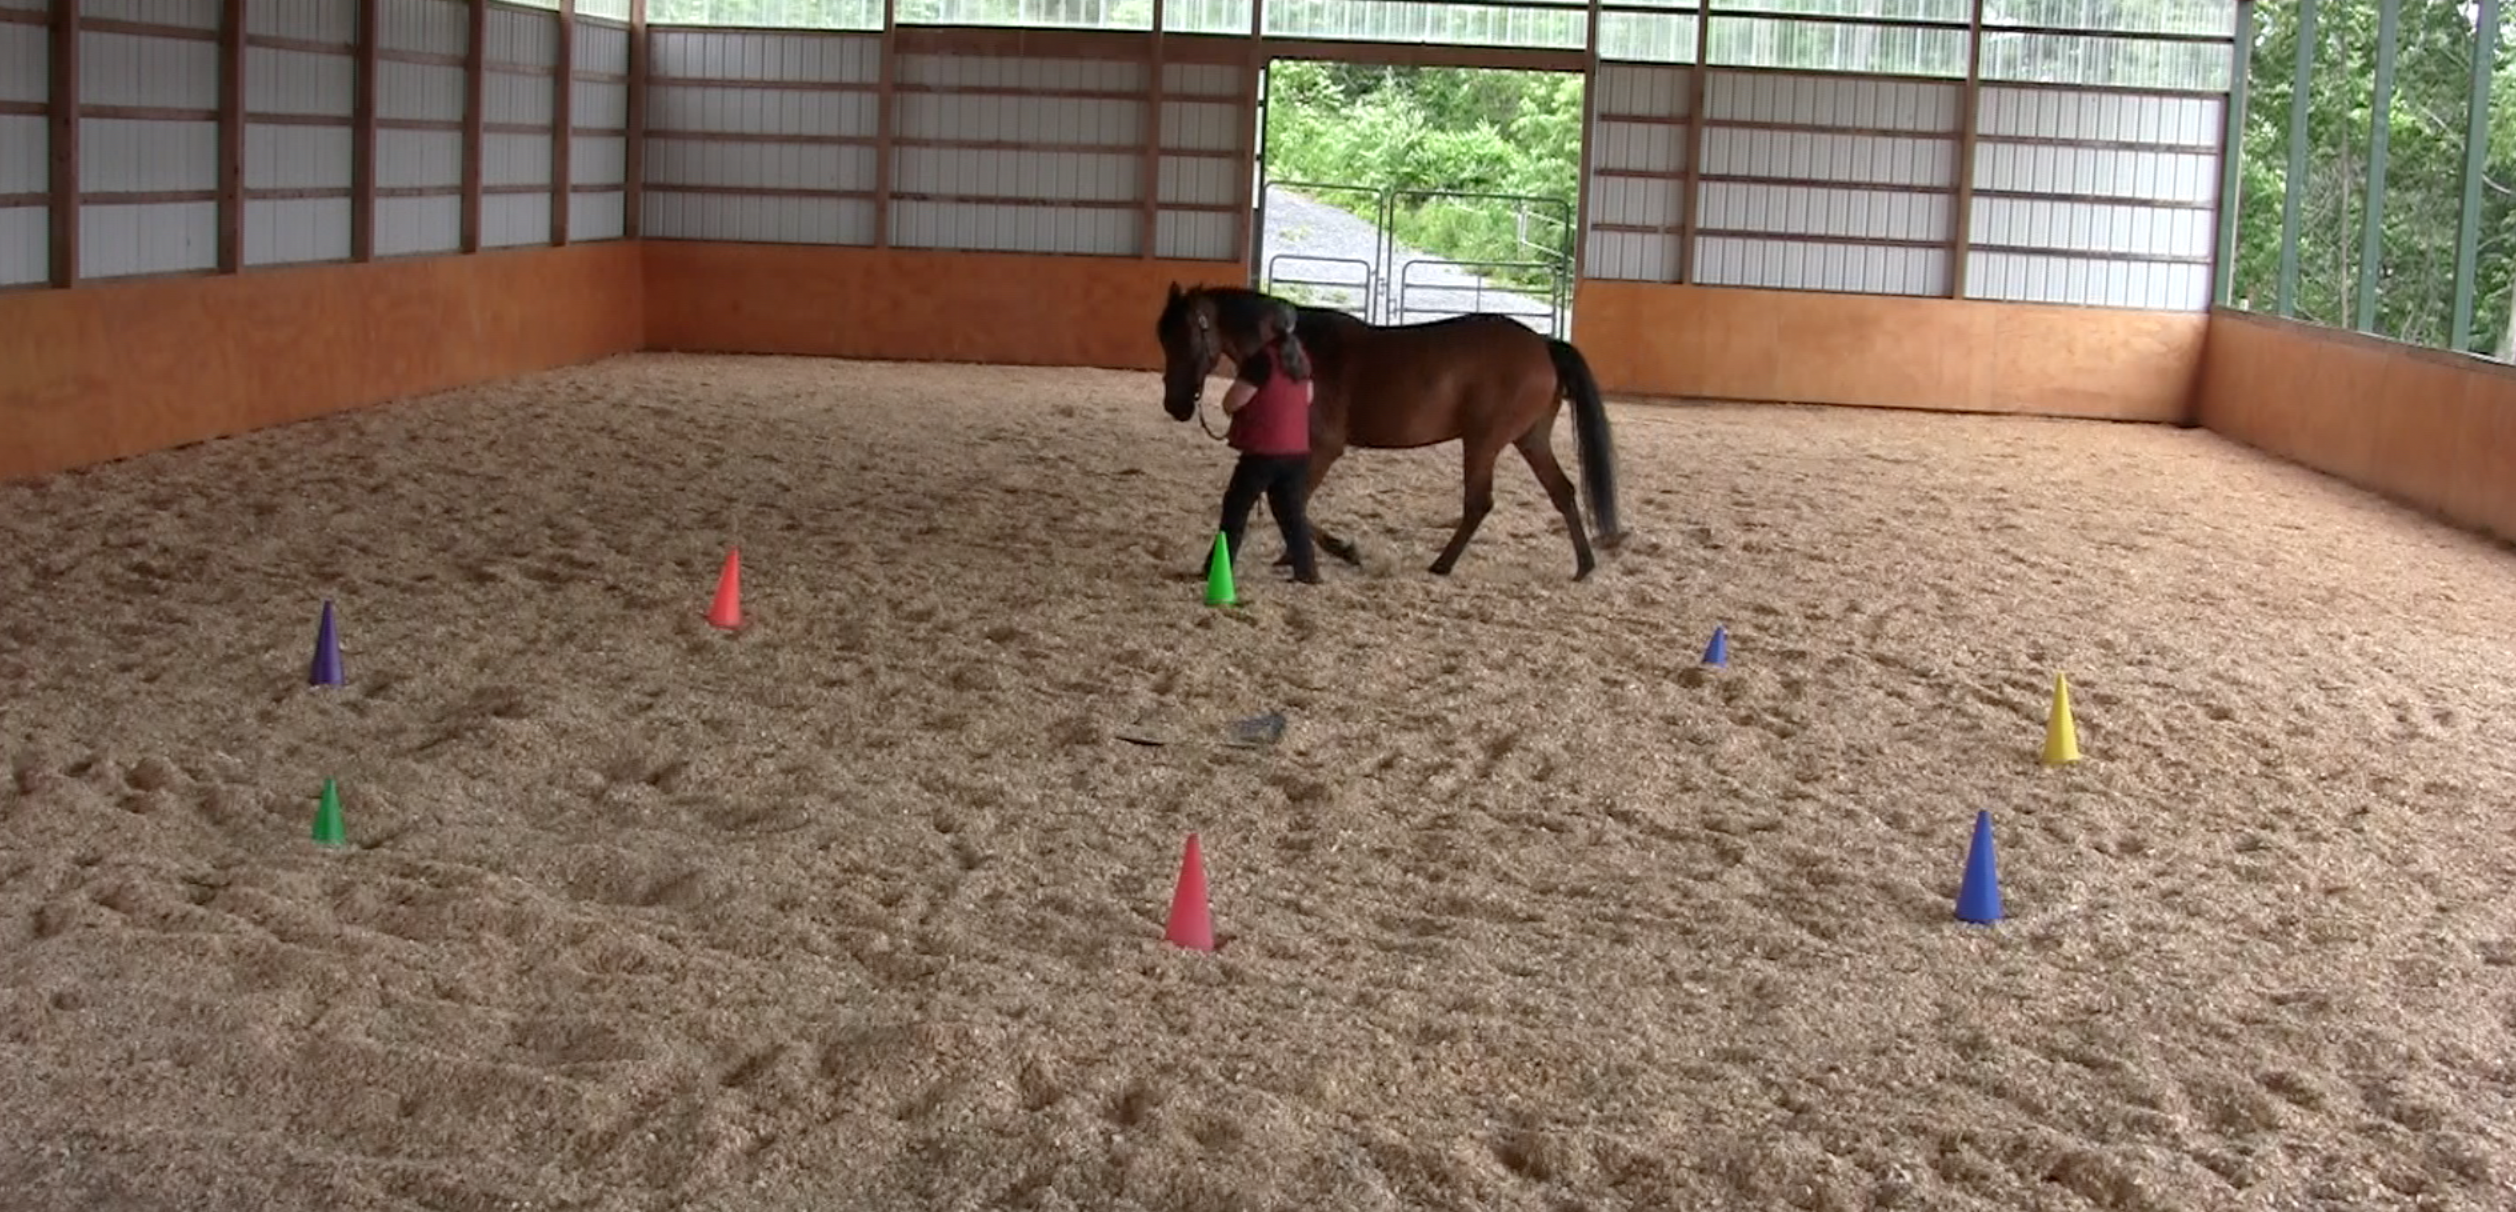
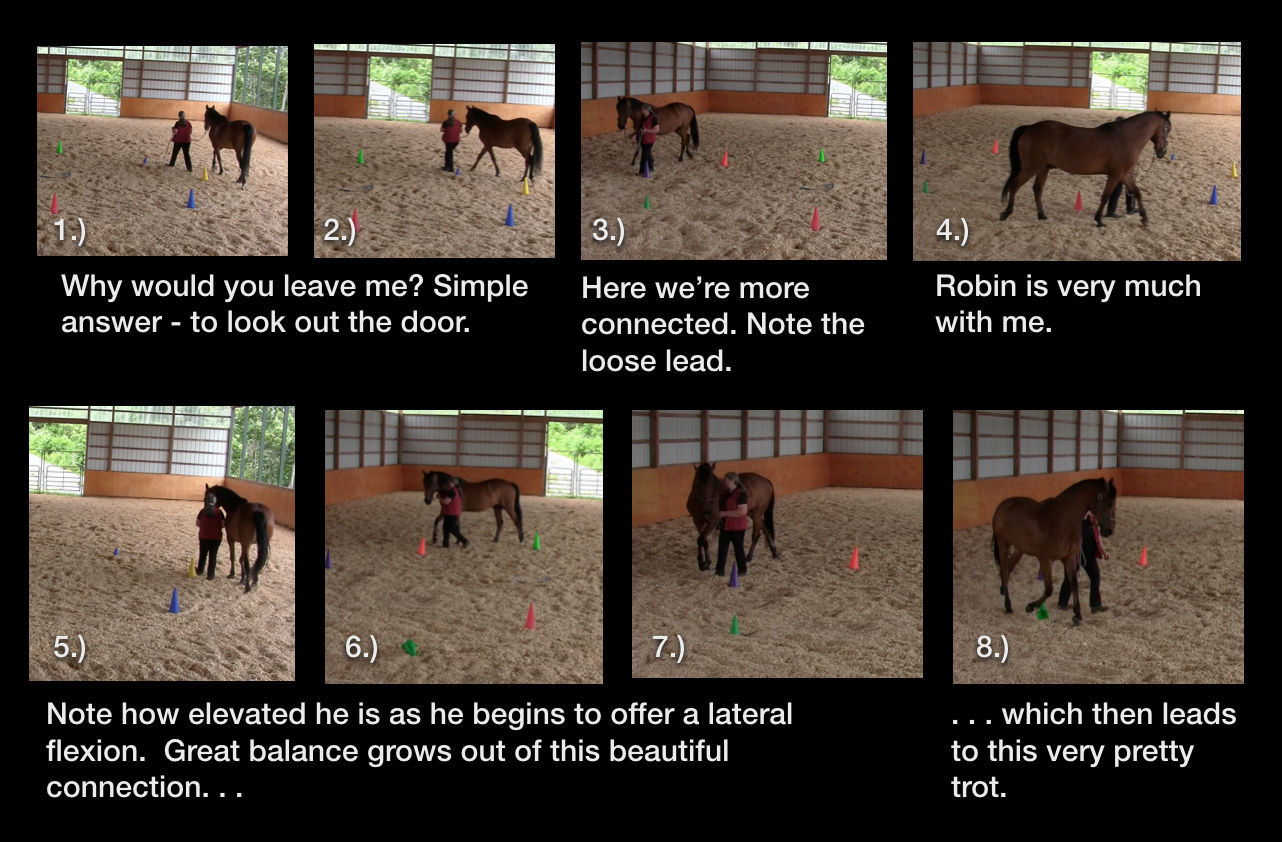
The overall description is this: the handler sets out a circle of cones and then leads her horse around the circle. The basic question is: can the handler let go of the lead/rein and have her horse stay with her like a dog heeling at her side? Or when she let’s go, does her horse wander off the circle, lag behind, rush ahead, or push into her to cut across her path? Where is his attention – with her or elsewhere outside of the circle?
Robin has his attention on me as we walk around the “Why Would You Leave Me?” circle.
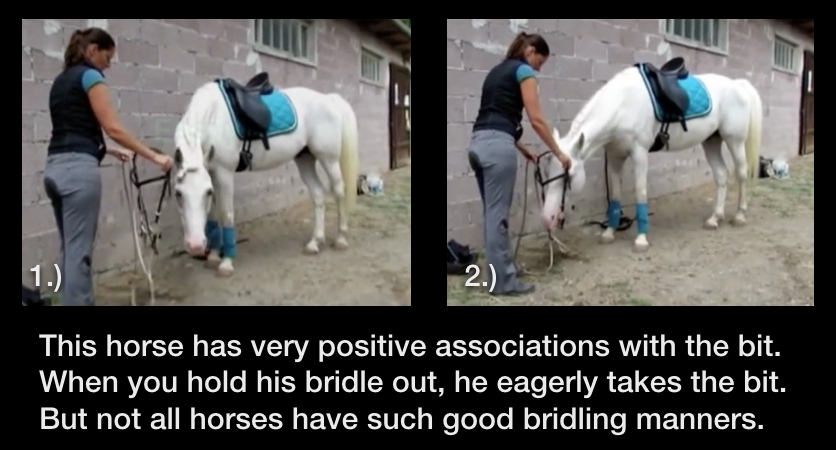
It doesn’t matter if the horse can do this perfectly at liberty, wearing nothing on his head. Lots of things change when a horse is “dressed” for riding. The horse that walks beautifully by your side when he’s wearing nothing, may become an anxious freight train when he’s wearing a bridle.
Some people may jump to the conclusion that a horse who becomes anxious when he’s wearing a bridle dislikes having a bit in his mouth, but that may be a red herring. If we went back to that horse’s first encounter with a bit, we might discover that he was one of those youngsters who always seemed to have something in his mouth. His handlers were forever taking lead ropes, brushes, halters out of his reach. If you left anything close enough to grab, he would have it in his mouth. So when he was offered a bit, there was nothing unpleasant about it. It was something he could put in his mouth, and finally his people didn’t snatch it away from him!
But then the reality of riding set in. Riders bounced uncomfortably on his back. His saddle pinched his shoulders, and worst of all, when he guessed wrong or headed off in his own direction, his riders jerked on the rein so the bit hurt his mouth. It wasn’t long before someone approaching him with a bridle became a predictor of unpleasant things to come.
Of course, this isn’t the only outcome for riding. The sight of the bridle can mean a fun clicker game is about to begin. But for a horse who has been ridden with corrections, the bridle often triggers unpleasant associations.
You could decide to work exclusively at liberty, or you could help this horse out by explaining away his anxiety about halters, leads, bridles, and saddles. Every time you explain away a fear, you remove a potential source of stress for your horse. That’s a process that’s worth doing.
Expectations
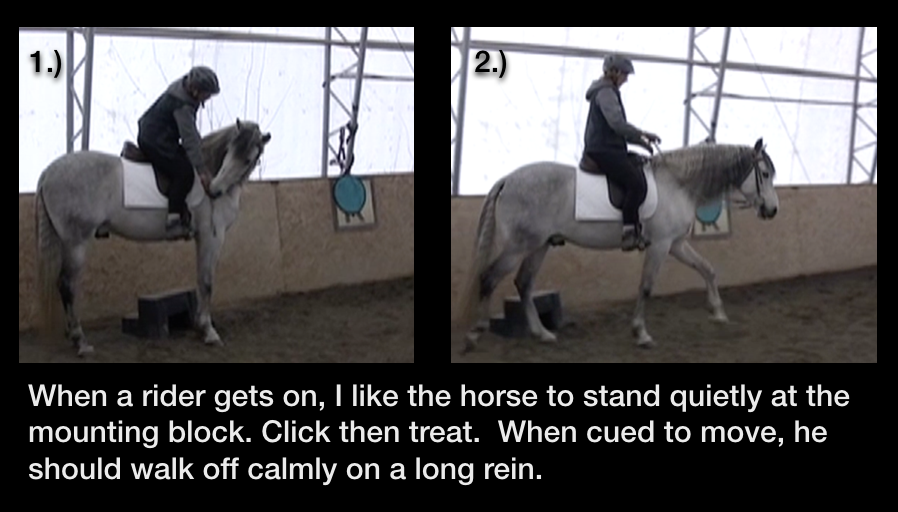
When I first get on a horse, I like to walk off from the mounting block on a loose rein. (And yes I do use mounting blocks. I feel very strongly that they are a courtesy to the horse. They save strain to his back. You save strain to yours, and you protect your saddle from becoming twisted.)
I want the horse to stand patiently at the mounting block until I signal to him that I am ready for him to walk off. I’ve watched too many horses who barely let the rider settle into the saddle before they take off. The rider is snatching up the reins and blocking the horse before they’ve even gone two steps. The horse protects himself by throwing his head up and tightening his jaw which then hollows his back. The ride has barely begun, and already they are in a training hole. It’s a long way from play for either horse or rider.
When I get on, I expect my horse to wait patiently while I get myself organized and settled into the saddle. I appreciate these good manners, so I always click and treat the horse for standing well. I’m sure there will be some who feel that the horse should not need to be be reinforced for behavior that he knows well, but I like to say “thank you” by marking good responses with a click and a treat. It costs so little to maintain this ritual. I ride with clicker treats at the ready. Offering one as a thank you takes no real effort, and it means that my horses can be trusted to stand quietly at the mounting block.
When we are ready, I cue the horse to walk off. I want him to walk off on a loose rein. On a green horse, this may not be possible. Two steps on from the mounting block I may be picking up the rein and sliding down asking for the hip, but the goal is to have a horse who leaves the mounting block in an energetic, but relaxed walk. The reins are long. I don’t want to be shortening them up and restricting the walk in any way.
This is important. It gives me time to evaluate how my horse is feeling on that day. Where is his back? Does everything feel as it should, or is there a stiffness or an uneven feeling that I need to be aware of? What is his energy level? How does everything compare to previous rides? Can I feel the effect of the previous lesson in the start-up? What is available to me? What do I need to work on? As Mia Segal (June 9, 2016 post) would say, if you know the questions, you have the lesson.
Walking Off Casually and the “Why Would You Leave Me?” Game
Walking off casually gives us time to come together as a riding pair. It gives me time to evaluate where my horse is on that particular day, both physically and emotionally. But walking off casually is not a given. It is something I have actively taught to my horses. It begins on the ground with the very first leading lesson and is further expanded upon in the “Why Would You Leave Me?” game.
This lesson is best taught on a circle. Every time the horse takes his focus away from the handler and begins to leave the circle, the handler slides down the lead and brings the horse back onto the circle. The handler is essentially asking the question: why would you leave me?
This is such an important question to ask. Are you leaving because the environment is too distracting? In that case perhaps the best option is to move to a less distracting location. And note the distractions could be from things the horse is afraid of and wants to get away from, such as a tarp that’s come loose over the shavings pile. Or it could be things the horse wants to go towards, such as grass or his pasture buddies.
Are you leaving because you are so full of energy that you can’t walk at my pace? Are you leaving because you aren’t balanced enough to stay on a circle? Are you leaving because you’re afraid of me?
Robin begins by being momentarily distracted by something out the back door, and ends with some lateral work and a beautifully balanced, connected trot.
These are all questions I want to ask and have answered before I put my bones up on the horse. That’s the purpose of the “Why Would You Leave Me” game. The end result will be a horse who walks with you without needing to be held there with a lead.
We begin on a circle so the loop keeps repeating itself. If your horse tends to crowd into you as you pass by the gate, and you missed noticing until he was already pushing you off the circle, don’t worry. You’ll come around to that point again, and you will be better prepared to ask for what you WANT him to do. Eventually, you’ll be able to leave the set pattern of the circle and walk complex patterns.
In this video Panda shows off her “heeling” skills. She’s working with Sue Bennett, one of the coaches for my on-line course. Sue and Panda have just met, but that doesn’t matter to Panda. She’s happy to stay connected. Why would you leave me? For no reason at all.
My thanks to my coaches: Michaela Hempen and Asfaloth for the bridling pictures; Monty Gwynne and Icaro for the mounting block; Sue Bennett and Panda for the heeling video (and Ann Edie for letting Sue play with her guide horse); and Robin for the “Why Would You Leave Me?” photos.
Also please note: I am not attempting to provide complete instructions for any of the lessons I have described in this post. Nor have I detailed how to ride in a way that is clicker compatible. That’s not the function of these posts. You will find very thorough instructions in my books, DVDS, and on-line course. Visit: theclickercenter.comtheclickercentercourse.com
Coming Next: Cue Communication Part 4: Capture the Saddle – A Targeting Game
Remember, if you are new to the JOY Full Horse blog, click on the JOY Full Horses tab at the top of this page to find the full table of contents and links to each of the articles I have published so far.
I hope you will want to share these articles by sending links to this blog to your friends. But please remember this is copyrighted material. All rights are reserved. Please do not copy any of the “JOY Full Horses” articles without first getting written permission from Alexandra Kurland, via theclickercenter.com
Also note: these articles are not intended as an instruction guide for introducing your horse to clicker training. If you are new to clicker training and you are looking for how-to instructions, you will find what you need at my web sites:
Behaviors Become Cues
In the previous section I wrote about Panda and the guide work she performs. Just as guide work made the perfect example for understanding environmental cues, it also shows so clearly how this back and forth cue communication works.
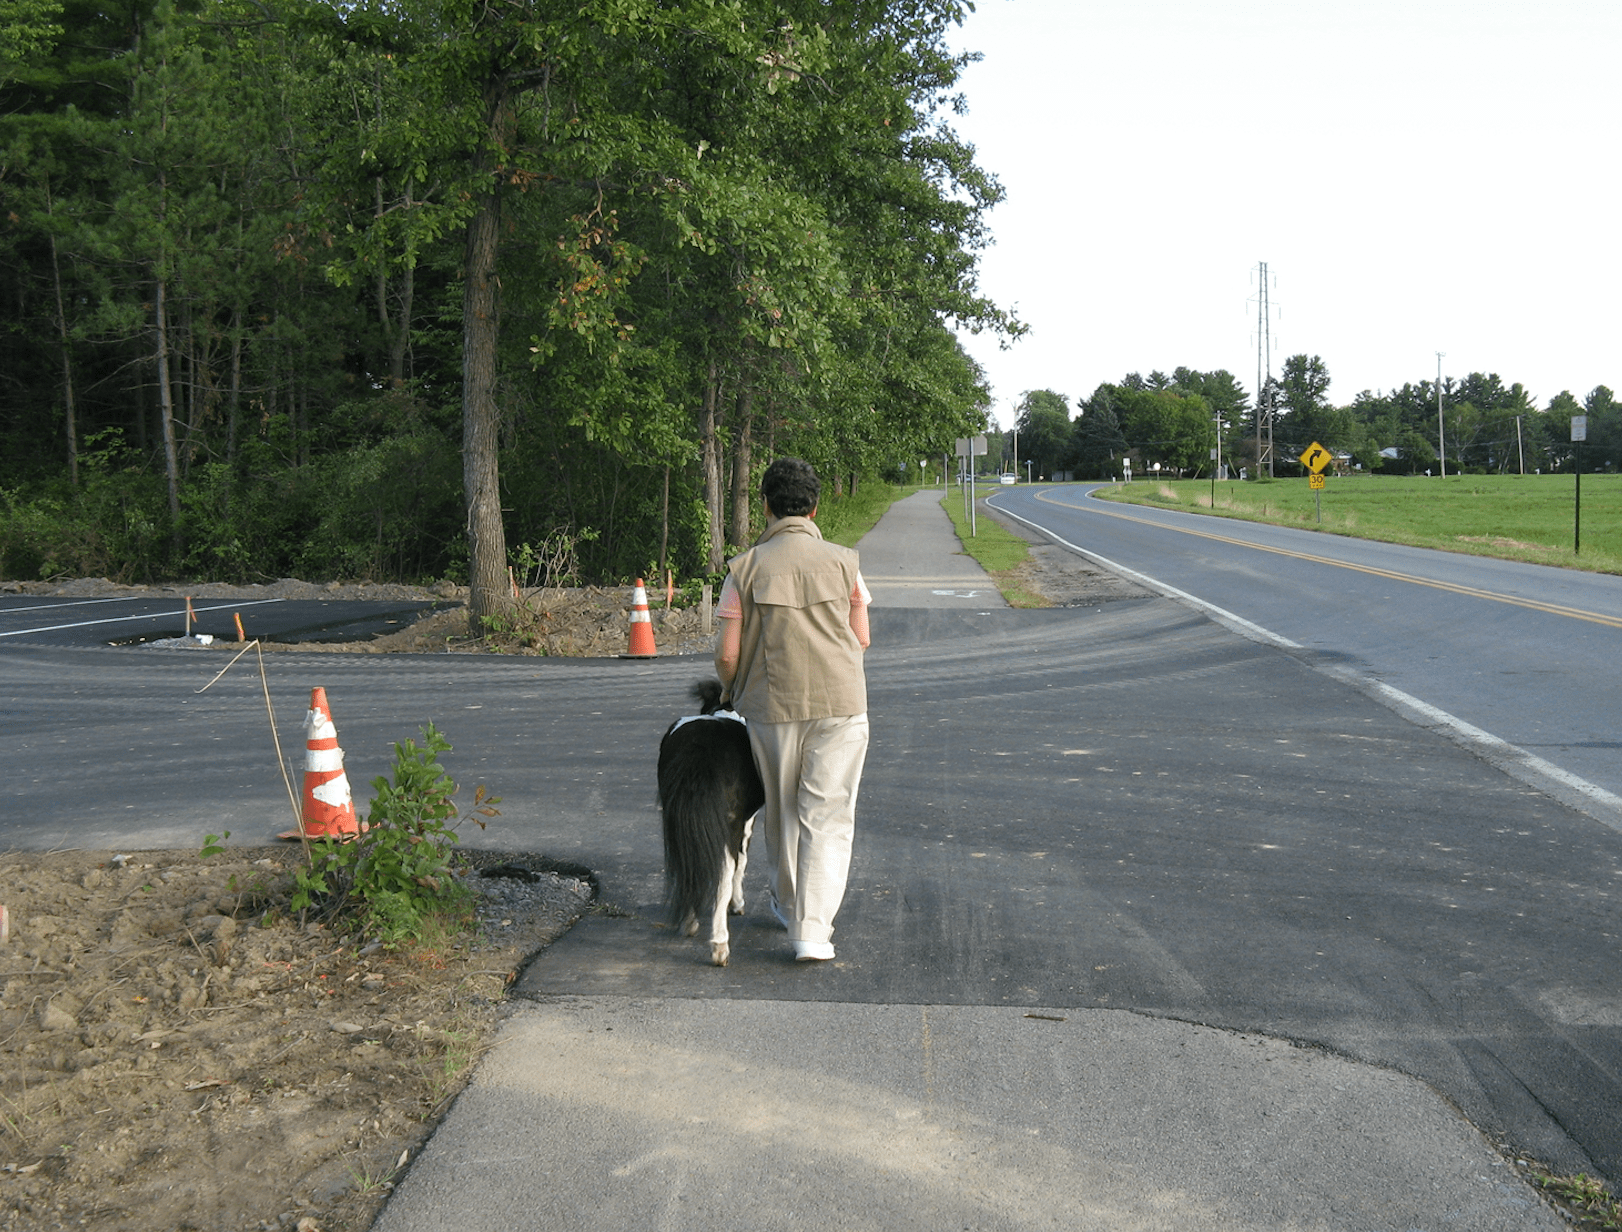
This is a particularly challenging form of curb for a guide because there is no clear difference between the end of the sidewalk and the start of the driveway, but Panda was always consistent at stopping where she should. Even when the surface was repaved, changing many of the familiar environmental cues, she was rock solid in her guide work. The driveway is the entrance to the parking lot for the district school buses so there was always a lot of traffic in and out. Stopping accurately at this crossing was essential.
When Panda gets to a curb, she stops. If it’s the up curb on the far side of a street crossing, she’ll put one foot up on the curb. This tells Ann not only that there is some sort of obstacle in front of them, but where to look for it.
Ann finds the obstacle by searching for it with her foot. She then cues Panda to go forward. Panda walks on. Ann may then tell her to trot on with a “hup, hup” verbal cue. Panda will increase her speed by breaking into a brisk trot. But she may then stop and pull to the side. Perhaps a pedestrian is coming in the opposite direction pushing a baby carriage and walking a dog. There isn’t room to pass, so Panda alerts Ann that there is “a situation” ahead by stopping and moving them over to the edge.
Traffic checks are another great example of cue communication. It’s up to Panda to alert Ann and either to refuse to go forward, or to back them up out of harm’s way.
In all of these examples Panda is using the behaviors we have taught her in their appropriate context to provide Ann with the information she needs.
Mounting Blocks as Cue Communication
Cue communication can take other more subtle forms. One of the early behaviors I taught to Peregrine via the clicker was to line himself up to the mounting block. He was already very good about walking with me to the mounting block and standing quietly while I got on, but I wanted to add a bit of clicker flourish to the behavior. So I used two targets. The first brought him to the mounting block and the second took him forward a couple of steps so he ended up positioned exactly where I needed him to be in order to get on.
The targets quickly faded to hand signals. I was able to leave him in the center of the arena, walk the ten to twenty feet over to the mounting block, and call him to me. He would come and line himself up without my having to make any adjustments via the reins.
It became a favorite behavior. In fact, if I forgot and started to lead him to the mounting block, he would hang back. How silly of me! I’d let go of the reins and head by myself to the mounting block. He’d wait until I signaled to him, and then he’d come directly over and line himself up.
This behavior could always be counted on night after night even in a busy arena. Peregrine would wait in the middle of the arena while all the other horses went past. When the coast was clear, I’d cue him to come. He never wandered off to visit with the other horses or to look for the scraps of hay which could always be found in the arena. Coming when cued was a consistent, sure-fire behavior – except . . . every now and then he would stall out in the center of the arena. I’d cue him to come, and he’d just hang back.
I never forced him over to the mounting block. Instead I checked his feet, I listened for gut sounds, I took his temperature. Hanging back from the mounting block was his way of telling me that something was wrong. It was my early warning sign that he wasn’t feeling well.
Trust Your Horse, Trust the Process
I can just hear the harrumphers now. What nonsense! All you’re doing is teaching your horse that he doesn’t have to listen to you. You’re letting him get away with not coming. You’re rewarding him for hanging back. You’re just going to get a horse who never goes to the mounting block.
Except that’s not what happened. I trusted Peregrine, and I trusted the work we were doing together. I truly believed that riding was fun for him. He wanted to be ridden.
He showed me this in so many ways. We’d be working on shoulder-in, adding our clicker bells and whistles to the basic movement. He’d give me an extra lift through his shoulders, and I’d click and pull a peppermint – his favorite treat – out of my pocket.
He could hear the crinkle of the wrapper as I was undoing it. Through the saddle I could feel his excitement. If the paper was very stuck to the peppermint so he had to wait a bit longer than usual, he’d give a soft nicker of anticipation. Finally! I’d reach down, and he’d take the treat gently from my fingers. I’d hear the quick crunch of the candy, and then he’d be ready to move on. I’d touch the reins and without missing a beat he would pick up into another stride of even more glorious shoulder-in. How could I not click that!
Of course he loved to ride! Riding was the ticket to laughter, to lots of praise, to scritches on the neck, and best of all to peppermints!
So on the nights when he hung back, I knew he wasn’t feeling well, and I always listened. He’d had a long series of serious health issues following a bout of Potomac Horse fever. I needed this early warning system to be up and functioning so I could monitor his health.
Capture the Saddle
I teach the mounting block lesson very differently these days. The lesson is called “Capture the Saddle”. It begins with rope handling and directed learning and ends with targeting. I teach it in this way because I regard the mounting block lesson as a final safety check before I give the okay for a rider to get on.
A horse that has been well prepared with good ground work, will breeze through this lesson. The prerequisite is a lesson that I refer to as the “Why Would You Leave Me?” game. In the next section I’ll describe both these lessons and the reasons for them.
Coming Next: Unit 4: Cue Communication continued: The Mounting Block Lesson
Remember, if you are new to the JOY Full Horse blog, click on the JOY Full Horses tab at the top of this page to find the full table of contents and links to each of the articles I have published so far.
I hope you will want to share these articles by sending links to this blog to your friends. But please remember this is copyrighted material. All rights are reserved. Please do not copy any of the “JOY Full Horses” articles without first getting written permission from Alexandra Kurland, via theclickercenter.com
Also note: these articles are not intended as an instruction guide for introducing your horse to clicker training. If you are new to clicker training and you are looking for how-to instructions, you will find what you need at my web sites: