Goat Diaries: Clicker Training Day 4

The Goat Palace: Training is Accumulating Fast!

The goats are doing great.  My journal notes are filled with superlatives.  The basics are becoming much stronger and more reliable.  Each session opens the door to a new possibility, something I can now ask for that would have been hard to get just a few days before.  They are so much fun!  I love quick, eager learners!

But before I get swept away with their current training, it is worth going back to the July Goat Diaries to see what the first steps of the learning were, not just for them, but for me, as well.

Just before Thanksgiving I had finished posting about Day Three of their training.  (https://theclickercenterblog.com/2017/11/20/)  Three days doesn’t sound like much, but that was fourteen training sessions.  I had introduced Elyan and Pellias (E and P as I referred to them in July) to the bare bones of targeting.  They had been on platforms.  On day four I was planning to add in a second platform.  So let me jump back to July.  Hopefully, this won’t confuse you too much.  I wish I had begun posting these Goat Diaries sooner so there wasn’t this overlap, but that wasn’t how my summer unfolded.  And perhaps it is better this way.  You can see both how these first steps can be built, and at the same time how much fun you can have using these foundation skills.

Remember in July I had not yet expanded the roof of the lean-to to create the goat palace.  Instead E and P were living in the barn in one of the horse stalls.  I was using the stall, plus the outside run as my training areas. So back to July . . . .

The July Goat Diaries: How We Get Behavior

My main training goals with Elyan and Pellias were: to stabilize their behavior around food so they were safe to feed treats to; and to work on basic leading.  I was going to have these goats for less than two weeks.  At the end of that time they would be going back into the 4-H program that Sister Mary Elizabeth ran for the children in her area.  At the end of the summer the goats would be going to the county fair and to several fiber festivals.  To be shown in the ring, they had to lead.  So anything I could do to help them with their leading manners was a plus.

It may not seem that teaching them to target and to stand on platforms had anything to do with leading, but they are all connected.  I was creating the building blocks that would make adding in a lead much easier.  To help you connect the dots between these foundation skills and leading remember in clicker training there are many strategies you can use to get behavior to happen.  You can lure behavior with food.  I was certainly using that with the goats when I had them follow a bucket of hay back into their stall.

Food luring can be a very effective and humane management technique, especially under conditions when other skills have not yet been taught.  It is much less stressful for a herd animal like these goats to follow a bucket of hay into an enclosure, than it is to be driven from behind.  Getting the goats into the habit of following me and my bucket of treats was a first step towards having them stay with me on a lead.

Targeting is another way to get behavior.  The goats were in the early stages of understanding targeting.  I had used it to begin their introduction to clicker training.

Goats day 2 target practice E - 1.png

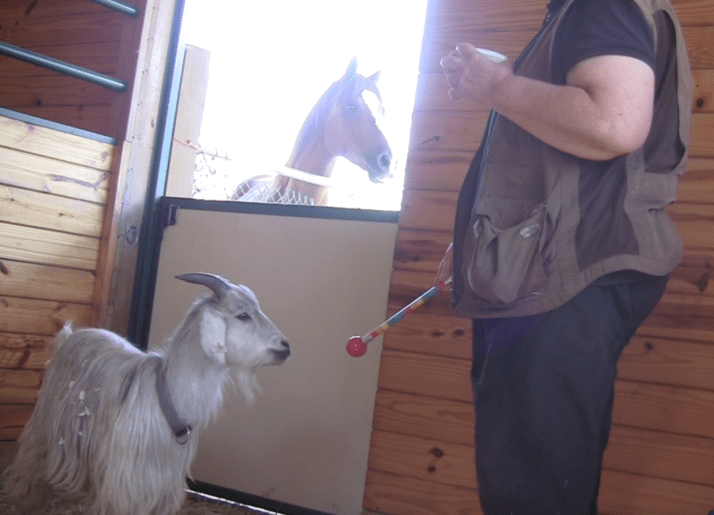
Elyan learning about targeting.

That was step number one.  The more you explore targeting, the more you discover what an incredible teaching tool it is.  Targeting is very much part of leading.  We usually think of targets as a visual aid.  Certainly the handler becomes a visual target.  But I also want the feel of the snap under a horse’s halter to become a target.  In this case it becomes a tactile target – follow this feel.

Tactile targets take us to rope handling which takes us to a discussion of pressure and release of pressure.  Often the mere mention of pressure makes some people cringe. That’s what they want to get away from when they clicker train.  But we do put halters and leads on our animals.  So the question is not do we use pressure, but how has the response to pressure been taught?  Is it information or a threat?

Escalating pressure has a do-it-or-else threat embedded in it.  This is what we want to get away from in clicker training.  But pressure doesn’t have to become painful or frightening to have an effect.  It can simply close one “door” while leaving other doors open.  When you’re trying to figure out how to use pressure in a learner-friendly way, that can be a helpful metaphor.

Used well a lead provides clues that help an animal get to his reinforcement faster.  Suppose I want my learner to back up.  I could simply wait until I see a shift of balance back.  If I’m lucky, the animal will shift back quickly, but he’s just as likely to try other directions first.  That introduces more “noise” into the process.

Think about situations in your own life where having some boundaries was helpful. Computers offer us so many good examples.  You want something to change on your screen, but nothing is happening, so you start hitting buttons.  Is it this combination or this one?  When you finally do get the response that you wanted, do you remember what you did?  Can you repeat it without first trying all the errors?  Probably not.  How do you feel?  Frustrated.

But now think about those times when the computer gave you a “not this way signal”.  When you tried something that wasn’t going to work, you heard an error message.  It sometimes takes me a couple of repetitions to realize that that ping I’m hearing is the computer telling me what I’m doing isn’t going to work, try something else.  Oh, right.  That door is closed.

At least the computer is communicating something.  I must be hitting the wrong keys.  Yes, I was pressing down the cap lock key instead of the shift key.  That’s why I was getting that error message. 

The error message doesn’t change.  Siri doesn’t come on and start yelling at me.  The computer doesn’t tell me if I don’t change my behavior and do what it wants, it will start destroying files.  The computer remains non-reactive to my emotional displays of frustration.  When I finally notice that I’ve been hitting the wrong key, it responds immediately by producing the result I want.

When I was trying to push through the wrong “door”, it gave me a clear message – try something else – but nothing else escalated.  Good rope handling is very similar.  When my animal partner learns to pay attention to the information the lead is providing, it doesn’t just close doors, it shows him which ones are open.  What is the fastest path to the click and treat?  Leads provide boundaries.  Used well, they also provide very welcome information.

The lead provides simple messages.  Slide down the lead and you are saying: “I want something.”  Staying on the lead closes doors.  Now you’re saying: “Not this way, but keep trying.  There is an open door, and I know you can find it.”  Releasing the lead says: “Great! You just found the answer!”

All of this has to be taught.  I can’t expect my learner to understand the cues a lead can provide first time out of the box.  If he’s had confusing, inconsistent, or punitive experiences with the lead, then the teaching process becomes even more involved.  I’m not working with a clean slate.  I have to show him through my actions that I’m not intentionally going to use the lead to hurt or scare him.

An animal that has not been carefully introduced to leads may not understand this.  His learning history may tell him to try to push on the “door”.  Bang on it hard enough and it will open!  Goats certainly know about pushing through things!  And so do many horses.

I want to build my training steps systematically so my learner can safely, comfortably discover that pushing on the door isn’t needed.  When he encounters a closed door, that’s a hint.  It means try a different direction.  The faster you stop banging on that door, the faster you’ll find the one that is open – click and treat.

Elyan and Pellias both wore collars, but so far I had avoided putting leads on them.  I wanted to give them some other skills first which would help them understand how leads worked.  We were heading to leading, but not directly.  The training principle is: Never start with your goal.  The more steps you put between where you are and where you want to be, the smoother and more successful the learning experience will be.

More steps in part means learning to use more than one teaching strategy.  So here is another training principle:  There is ALWAYS more than one way to teach any behavior.  The more ways I come up with to teach the same thing, the stronger that base behavior will be.

So another teaching strategy I use is referred to as free shaping.  Here you are not using any prompts such as a target to trigger the behavior.  Instead you are simply observing the individual and marking those moments that take you in the direction of your shaping goals.

When people talk about the magic of clicker training, they are referring to freeshaping.  Yes, it is good science, but it does look quite magical when an animal begins to consistently offer a complex behavior and the handler has “done nothing” but click and reinforce tiny stair steps towards the desired behavior.  There have been no targets and certainly no whips.  You haven’t applied pressure by moving into the animal’s space. You’ve just sat in your chair, and now suddenly your animal – goat, horse, dog – is backing up twenty feet.  Very neat.

I have always considered free shaping to be an advanced skill for both the handler and the animal learner.  A handler who is just learning how to change behavior through incremental steps will miss clickable moments.  The criteria will be unclear.  The timing will be off.  The result: a learner who is becoming increasingly frustrated and confused.  A confused learner leads to a confused handler.  Put those two things together and you get a mess.  That’s no way to begin with clicker training.

Freeshaping may be an advanced skills, but you need to practice free shaping in order to build your skills.  Here’s the mantra: for every complex behavior you teach, there will be some element that is free shaped.

I may use my rope handling skills to get a horse to step onto a mat.  Once he’s standing there, I’ll free shape his head orientation.

I was going to use this concept with the goats.  I got them to the platforms with the target. Once they were on the platform I wanted to free shape head orientation.  My starting point was a goat who was indeed standing with all four feet solidly on the mat, but his head was reaching up towards my pockets.  I knew what I didn’t want.  I didn’t want him straining up towards me, or the opposite – curling his neck down so he looked as though he was about to ram something.  I wanted him standing all four feet on the platform, with his head up, and looking straight ahead.

The problem was the goats never really presented me with what I wanted.  They looked off to the side, or up at my pockets, but rarely were they looking straight ahead.  If I insisted on perfection, my rates of reinforcement would drop.  I’d get a frustrated goat, and I’d already seen what frustrated goats do.  Jumping up on me was not an answer I wanted them to be practicing.

To help prime the pump I had been using the food delivery to approximate the behavior I wanted.  My concern was I might be getting too much of a curl of the neck.  I didn’t want to trigger head butting.  So that was my question as I began the morning session.  What had these goats learned from the previous day’s training?  Good things I wanted?  Or would  I be left with “Oh dear, let me go have another cup of tea and rethink where we are.”  I was about to find out.

Session 1: 8 am with P.

I wanted to make the target more meaningful to P. He clearly liked being up on his platform.  So perhaps if I set out two platforms and used the target to move him from one to the other, he would begin to have a better understanding of targets.  Targets are things you orient to get to other good things.

I set out two platforms, the original foam platform and a new one made out of two heavy blocks of wood.  P went directly to the foam platform, click and treat. I worked on his head orientation.  Mostly he was stretching his nose out towards me.  I tried to catch moments when his head was down, but I needed to be careful with that.  I didn’t want to teach him to lower his head into head butting position.

I used the target to move him to the second platform.  He definitely got the idea of moving from one platform to another, and he was staying on the platform well.  It seemed as though this was going to be a useful approach for him.

I did not film this session because there was a light rain so I have no pictures to share.

E’s Session

E’s session – I worked E in his stall.  That seemed easier than switching the goats.  I already had the makings of two platforms.  I dismantled their corner platform and used two of the blue blocks as bases for single platforms.  E was concerned with them at first so I put the plywood on them, and he was fine about getting up on the blocks.  I again added in the scratching after feeding so he got very soft-eyed and dreamy.  I liked this association.  Clicks are followed by treats (exciting!) which are followed by head scratching (dreamy).

The whole peanuts took too long to eat, so I had been breaking them up.  He wasn’t particularly interested in the hulls, but he did like the peanuts.   I had also added sunflower seeds to the mix in my pocket, and those he really liked!  We had a lovely session going from platform to platform.  He was getting treats and attention.  And I was getting more good data to record in my journal.  Win-win for both of us.

When we were finished, I opened their stall door so he could go out into the pen with P.  Instead of staying out, P came into the stall and got up on a platform.  So E came back in as well.

They started sparing over who got the platform.  I managed to get each one on his own platform and reinforced them for staying put.  Once I have taught them individually about platforms, this will definitely be a usable approach for teaching them to work as a pair.

When I was all done, I spent a few minutes scratching them both, then I left them with some treats scattered over the floor.

The Goat Palace: Working in Pairs

So now I’m going to jump forward to the present.  I just described the very bare bones beginning of using multiple platforms to work the goats together.  I’ve been building on these skills both with Elyan and Pellias, and Thanzi and Trixie.  It is key to being able to reduce the competition over food.

I was so impressed with Trixie and Thanzi yesterday.  I’ve been working them in their pen.  Each goat can now stay at her own station (a stack of plywood mats).  I can move to Trixie, offer her a target to touch, click and drop treats in her bucket while Thanzi stays on her platform.  Then I can go to Thanzi, and Trixie stays put.  That is such a change from the dashing from bucket to bucket that we started with.

Yesterday I took them into the hallway.  The narrow platforms were set out side by side.  They got themselves sorted, one on each platform.  I was pleased with the progress Trixie, in particular is making.  Thanzi, I know will leap eagerly onto a platform.  Trixie has been slower at figuring out that going to platforms is a great way to get clicked.  But there they both were each on her own platform.

I stood in front of them and waited for both of them to take their noses away from my pockets.  They could do it!  Click, treat.  And when I fed them, they stayed each in her own space to get the treat.  They didn’t try to crowd in and snatch treats from one another.  That’s huge progress, but wait it gets better!

Remember these goats were side by side.  The treat bowls were right in front of their platforms.  I could click one, drop treats in her bucket, and the other goat would stay put!  Of course, she got clicked and reinforced for staying on her platform.  Win-win for everyone.

Pellias and Elyan are becoming increasingly solid working as a pair.  I can now consistently use their stationing behavior as a management tool.  When I want them to go back into their pen, I call them and they both come running.  They dash onto their platforms: Elyan on the balance beam of a thick piece of wood, and Pellias on a stack of plywood mats.  Click – treat both several times.  Then click, drop treats and leave.

They stay at their stations hunting for the dropped treats in the hay instead of swooping in trying to get what the other one has.  That gives me time to call Galahad in and give him treats at the other end of the pen.  This core foundation skill is creating much more peaceful living conditions for everyone.

Before I can move on to teaching the “fancy” stuff, first there are these basics – the universals of day to day handling.  Done well, the basics become “fancy”.  They are certainly fun to teach.  Every day I feel like a small child who has been given another bag of leggo blocks to play with.  I can build so much more with the behaviors the goats are learning!  What’s next?  The goats will always tell me.

Coming Next:  Goat Diaries – Day 4 Learning About Goats


JOY FULL Horses: Understanding Extinction: Part 14

Our Creative Horses
Yesterday I shared with you the story of Robin’s “pose”.  The use of resurgence has helped us develop a much more systematic way of creating unlikely behaviors.  Because we understand the process better, we can be more deliberate in it’s use.  I ended the post by saying: “The end result may look like magic, but there is good science behind it.”

When we open up our training in this way and turn our learners into more active participants, we often find that they are even more creative than we are.  Once again Robin provided me with a great example of this.

When Robin was three I took him to the Equine Affaire to be my demo horse.  I wanted to show people what freeshaping via clicker training looks like.  I didn’t want them just to see the end product of freeshaping.  I wanted them to see me teach Robin a completely novel behavior.  The problem was he already had a pretty extensive repertoire. I was stumped for ideas, but I thought the easiest solution would be to use a prop.  One of my clients had been teaching his horse to flip a hula hoop up over his head.  I thought I could make a start on that with Robin.

Robin had been our first equine retriever.  Picking things up was solidly in repertoire.  I figured if I put the hula hoop on the ground, he would try to pick it up.  I’d be able to reinforce that and build it into Robin holding it longer which might over three days of demos lead to him flipping it over his head.  Such was my level of creativity, that’s all I could think of to work on with a hula hoop.

So during our demo, I brought out the hula hoop and tossed it out on the ground.  I was still explaining freeshaping to the audience so I wasn’t focusing yet on Robin.  While I was talking, he walked over to the hoop and stood with his front feet planted in the middle of it just as he would have stood on a mat.  Before I could respond to him, he reached down, picked up one side of the hoop and began walking himself forward foot by foot with the hoop!  That was his level of creativity!

The Creative Process
Here are the steps the horses have been teaching us:

First, you build a strong history of reinforcement for the component behaviors.

You change the situation somewhat so mild extinction comes into play.

You get a resurgence of these previously reinforced behaviors and new combinations emerge.  That’s creativity.  The most fun for me is seeing what the horses invent. As we have seen, they are often so much more creative than their human partners!

Familiar Landscapes
Kay Laurence might say we were seeing familiar landscapes with fresh eyes.

Dr. Jesús Rosales-Ruiz would say you have to understand the process of extinction before you can master it.  If you understand it, you’ll avoid situations that create macro extinction processes and all the frustration that goes along with them.  Instead you’ll use micro extinctions to build complex behaviors.

I would say that monitoring the level of extinction your learner is experiencing is a keys-to-the-kingdom part of good training.

I’ve just spent a couple of days working with a group of horses I have come to know well. One of them is a retired performance horse. Without going into a lot of details, I would describe him as an emotionally fragile horse. He’s easily worried.  If he thinks he has the right answer, he’s a superstar, but I always have to be careful how far I stretch him into new behaviors.  If he thinks he might get something wrong, he worries.  He’s come out of a training environment in which he had to perform correctly or his rider could get seriously hurt. I suspect he was punished for mistakes which accounts for his worry.

Mastering Micro
His back was looking prematurely aged so I wanted to teach him Robin’s “pilates pose”.  I had already shown him that he could get reinforced for lifting his back up and releasing at the poll.  In this particular session I was holding out for slightly better versions. As I withheld my click, I saw him experimenting.  Was it higher with his poll? Was it more lift of his back? What did I want?

The shifts he was giving me represented micro changes.  They were all within a clickable range.  Clicking him for any of these variations would have been fine, but I was waiting fractionally to see what else would pop out.

I was using micro extinctions to create the next step.  And because I was thinking about this in terms of extinction, I was monitoring closely his emotional responses.  I did not want him to become macro worried.  We were always just a second or two from a click so I could let him experiment without risking the emotional fallout of a larger extinction process.

Micro Masters
Micro is so very much the key.

Macro extinctions are frustrating.  Micro extinctions are part of good teaching.

Macro shaping can be confusing.  Micro shaping is elegant.

Macro negative reinforcement is literally painful. Micro negative reinforcement is clear communication. It is a conversation with cues exchanged in both directions.

When you go micro, your learner is always just a second or two away from a reinforceable moment.  You can cue another behavior, or you can simply click and treat. Either way, you are saying: “Yes! Great idea!” Micro Mastery is what we should be striving for in our training.  When you say someone is a great trainer, you are really saying that individual is a Micro Master.  In training that’s the “black belt” we should be aiming for.

robin-pg-lying-down-micro-masters

With this last section we come to the end of my JOY FULL Horses book – almost.  What remains is one final chapter and that’s what’s coming next.

Coming Next: Doorways

Remember, if you are new to the JOY Full Horse blog, click on the JOY Full Horses tab at the top of this page to find the full table of contents and links to each of the articles I have published so far.

I hope you will want to share these articles by sending links to this blog to your friends.  But please remember this is copyrighted material.  All rights are reserved. Please do not copy any of the “JOY Full Horses” articles without first getting written permission from Alexandra  Kurland, via theclickercenter.com

Also note: these articles are not intended as an instruction guide for introducing your horse to clicker training.  If you are new to clicker training and you are looking for how-to instructions, you will find what you need at my web sites:

theclickercenter.com                    theclickercentercourse.com

JOY FULL Horses: Part 3: Going Micro: Unit 2: Base Behaviors

Base Behaviors
In the previous post I introduced you to Kay Laurence’s definition of microshaping.  Often when people are freeshaping behavior, it is very hit or miss training.  They are too macro in their shaping plan, resulting in long dry spells between clicks.

Microshaping takes a very different approach.  In microshaping you are using very small steps, clear criterion, and well thought out training plans to create a success rate of 98% or better.  Base behaviors help to create this high degree of success.

A base behavior is similar to the tap root behavior I described earlier.  (Refer to: Cues Evolve: Part 2 published Sept. 1, 2016 https://theclickercenterblog.com/2016/09/01/) Returning to these behaviors over and over again creates a deep history of reinforcement and helps builds the learner’s confidence.

The base behavior is just what the name implies.  It is a behavior you keep returning to that serves as the end of one movement cycle and the starting point for the next.  Kay will often click as the dog returns to the base behavior, but she will toss the treat out away from the dog.  The dog runs to get the treat and then returns promptly back to the base behavior for another click.  If you’re clever, – and Kay is – you can build a huge repertoire of reaction patterns using the concept of base behaviors.

A base behavior might be a dog coming to a balanced stop with all four feet on a platform.  The dog returns to the platform because he knows he will get clicked.  As he lands on the platform, Kay clicks and tosses the treat so the dog must leave the platform to get it.  As soon as he gets the treat, the dog returns to the platform to get clicked again.

Kay tosses the treat out very strategically.  The path the dog takes to get back to the platform produces the behavior Kay wants.  That might be trotting around a cone to get back to the platform.  Kay gradually moves the cone out to the side.  The dog could by-pass the cone and go straight to the mat, but he’s learning that going out in a wide arc around the cone is part of the behavior.

Another function for base behaviors is they let you bring your learner into stillness so you can draw his attention to a small muscle movement. Kay offers a great example of how this works.  Suppose you want to teach your dog to wag his tail on cue.  When he’s with you, tail wagging is almost always present, so it may be hard for him to realize that’s what he’s being clicked for.  The solution: have your dog lie flat on his side.  This is your base position.  The rest of your dog is still.  Only his tail is moving.  As you click each time his tail lifts up off the floor, he’ll begin to realize that’s the desired behavior.

Grown-ups and standing on a mat are two great base behaviors we use with the horses.  Both keep the feet still so you can focus on ears forward, the pilates pose, or any other muscle pattern you may be working on.
robin-on-mat-1a
Tossing Treats
With horses we don’t generally toss treats the way you can with dogs.  It isn’t that horses aren’t capable of tracking a thrown treat.  It’s more that we don’t usually work on the kinds of surfaces that we want horses eating off of.  Tossing a treat out into a sand footing raises concerns about sand colics.  And the trouble with tossing a treat out into grass doesn’t need explaining.

Kay uses tossed treats to tremendous advantage when she’s working with her dogs.  Suppose she wants to teach her dog to back up.  She’ll teach this using a mat.  Once again, coming to a balanced stop with all four feet on the mat is the base behavior.  She clicks, and then tosses the treat out in front of the mat so he has to leave the mat to get to it.

Once he’s got his treat, the dog is going to return to the base behavior.  Initially the food is tossed just a step or two away from the mat so taking a step back is the easiest way to return to the mat.  Click.  The food is tossed out a step or two from the mat and the cycle repeats.  The behavior Kay wants is backing.  She get this through the strategic use of treats and the return to the base behavior of stopping with all four feet on the mat.

Once the dog is consistently taking a step or two back to get the mat, Kay will toss the treat a little further away.  Note, the change she makes is in the distance she tosses the treat.  She doesn’t move the mat.  The dog knows where it is.  He’s learning how to return to it from increasingly greater distances and varied directions.  This creates a very confident backer.

Precision
A 98% success rate depends upon precise criteria.

So picture this.  Kay has just tossed a treat out in front of her dog.  It’s a short toss.  He only has to go a step or two forward to reach the food.  Returning to the mat means backing up a similar number of steps.

Many of us would watch the front feet, and as soon as they were both on the mat, we would click.  And we would be wrong.

We would be clicking an outcome not a behavior.  The outcome is the dog standing with all four feet on the mat.

The behavior Kay looks for is the right front steps back onto the mat, followed by the left front stepping back onto the mat – click.  That’s precision training.

What is the difference?  This level of precision means the same behavior is consistently being marked.  In the outcome driven view of the world the dog might back right front, left front this time; followed by left front, right front the next; followed by a half step forward, then right front, left front.  Those are three different approaches to the mat.  Precision training creates clean, precise results.

Dynamic Food Delivery
We may not be able to toss treats to our horses in the same way that Kay uses them with her dogs, but we can certainly put the concept of strategic treat delivery to work and use it to our advantage.  When I’m teaching backing, I turn and walk with my horse as he backs up.  After I click, I’ll turn forward and walk as I get the treat from my pocket.  I move my feet WHILE I am getting the treat out of my pocket.

I’ll end up exactly where we started when I initiated the backing.  This resets the whole behavior so I can repeat that unit over and over again until it is clean and fluid.  Then I’ll follow the mantra of loopy training: when a loop is clean, you get to move on.  Not only do you get to move on, you should move on.

I’m not asking the horse to back up, click and treat, and then back up again without going forward.  That may seem as though it’s the same behavior – backing. To the horse each additional step back is a step into unknown territory.  Is he about to step into a hole or onto unstable footing?  Is he getting too close to the electric fence or the other horses?  Each step presents a new question which means each step is a completely new behavior.

Resetting via the food delivery means I can ask for the same step over and over again, creating a consistent response for this simple reaction pattern.  I’m not being outcome driven – backing through a specific pattern.  Instead I’m focused on the reaction pattern that will create for me the ability to ask for backing at any time, for any number of desired steps, in any direction and in good balance.

Training via reaction patterns means I can be precise in my criteria.  It isn’t any step back I am looking for.   It is this foot stepping back.  And more than that, I will be watching how the horse lifts his foot.  I’ll time my click so I’m marking the upward lift of the foot, not the part of each step where his foot is returning to the ground.  I will do this until my loop is clean.  At that point it will be time to change criteria and move on to an expanded version of this movement cycle.

The video illustrates how to use strategic food delivery in combination with a request to back.  It also illustrates the difference between training for reaction patterns versus outcome.  The overall function of this set-up is to teach my horse to back in a square.  If I were training with that narrow goal in my sights, I would ask my horse to continue backing around the perimeter of the square.  Instead I build the underlying reaction pattern that will make this an easy outcome to achieve.

Precision and Play Go Together
Precision training creates precision results.

This sounds hard.  It sounds as though you have to really be focused and thinking every second.  Clicker training is supposed to be FUN! How can you play if you have to be thinking every second about which foot is moving and what part of the arc to click in?

Remember that convenience store where all the lottery tickets are printed with winning numbers?  You look at your numbers and you’ve won!  Hurray!  You don’t have to think about what your lucky number is.  You don’t have to wonder if your non random numbers look random enough.  You can choose the same set of numbers over and over again.  Each time you’ve got a winner!  Easy!

Your horse steps back onto his mat – left front, right front.  You’ve won!

Hand him the food a step or two forward.

He steps back – left front, right front.
You’ve won again!

This is easy.  This is child’s play!

Learn to set up behavior, and it truly does become playful because laughter thrives on success.  Laughter dies away when there’s confusion.  When the clicks are few and far between, when your learner decides he’d rather go sniff the nearest manure pile than interact with you, that’s when play disappears.

Play evolves out of success.  Play evolves when both learner and teacher are relaxed and confident in the process.  Good technique, attention to detail, attention to your learner’s emotional needs are the breeding ground for play.

Coming Next: Part 3: Going Micro: Patterns

P.S. To learn more about Kay Laurence’s training visit: learningaboutdogs.com

Remember, if you are new to the JOY Full Horse blog, click on the JOY Full Horses tab at the top of this page to find the full table of contents and links to each of the articles I have published so far.

I hope you will want to share these articles by sending links to this blog to your friends.  But please remember this is copyrighted material.  All rights are reserved. Please do not copy any of the “JOY Full Horses” articles without first getting written permission from Alexandra  Kurland, via theclickercenter.com

Also note: these articles are not intended as an instruction guide for introducing your horse to clicker training.  If you are new to clicker training and you are looking for how-to instructions, you will find what you need at my web sites:

theclickercenter.com                    theclickercentercourse.com